If you want your home to be protected from the weather, render repair is one maintenance task that you just cannot avoid. Damage should be repaired as soon as it occurs. The first line of defence for our homes is their outside walls.
They not only support the structure but also keep the outside elements from entering your home. They also keep the interiors warm and cosy when built and maintained appropriately.
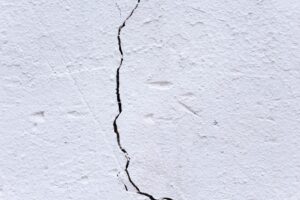
Do your renders have minute cracks? Over time, this usually takes place. The render will shift or crack if the wall at its back does.
So, structural movement may occasionally be a contributing factor. Compared to contemporary cement, traditional lime render is more adaptable and forgiving. In actuality, historic solid-wall structures shouldn’t ever have render placed on them.
This is why minor hairline cracks should be patched up as soon as they appear because if water seeps through, it could freeze, expand, and blow the entire surface away, leading to wider fissures. Where the initial render mix was excessively powerful, cracking from shrinkage can also occur.
However, moisture trapped between the render and the wall that has been exposed to cold is usually what causes render to crack and bulge.
You, as the homeowner, must be able to spot early indicators of failure and correct them in order for them to function well and withstand the constant assault of the elements.
Signs that the render needs replacing
- Cracks or chips in the render
- Discoloration or fading of the render
- Deterioration of the underlying masonry
- Algae growth or water staining
- Bulging or uneven render
- Cracks appearing in the render
- Stains, discoloration, or efflorescence on the render
- The render is flaking off or coming loose
- The render is not sticking to the wall
- Moisture is seeping through the render
- The render is showing signs of age and wear
- The render is not protecting the wall from the elements.
- Faded colour
- Salt deposits
Preparing for the replacement
- Remove the existing render and dispose of it properly.
- Clean the surface of the wall, removing any dust and debris.
- Check for any cracks or damage to the wall and repair them as necessary.
- Apply a bonding agent to the surface of the wall.
- Apply a scratch coat of renders to the wall.
- Allow the scratch coat to dry completely.
- Apply a second coat of renders to the wall.
- Allow the second coat to dry completely.
- Smooth the surface of the render with a trowel.
- Apply a finishing coat of render and allow it to dry.
Steps for replacing the render
- Remove the existing render. Use chisels, a hammer, and/or an angle grinder to separate the render from the wall.
- Thoroughly clean and prepare the wall, removing any old render and debris, and ensuring the wall surface is even and free of any loose or damaged material.
- Apply a scratch coat of the render, made with a mix of one part cement to three parts sand. This will help the new render bond to the wall.
- Allow the scratch coat to dry completely before applying the final coat of render.
- Mix the final render to the desired consistency, and apply it to the wall in an even layer.
- Use a trowel to create a smooth surface, adding texture and patterns as desired.
- Allow the render to dry fully before applying any finishing coat such as paint.
Reasons Why Cement Needs Replacing
- Deterioration – Over time, the render can become cracked, chipped, or flaky due to exposure to the elements. This can be worsened by dampness, such as from rain or flooding.
- Poor Quality – Poorly applied render can lead to issues such as cracking, crumbling, and flaking. It’s important to ensure the render is applied correctly to avoid such problems.
- Unsuitable Substrate – Render should only be applied to a suitable substrate such as brick, concrete, or stone. If the substrate is unsuitable, the render may not adhere properly, leading to a need for replacement.
- Damage – Render is vulnerable to damage such as impacts from hail or debris, or from human activities such as graffiti. If the damage is too extensive, the render may need to be removed and replaced.
Conclusion
The render, float, and set coats were the three successively thinner layers that made up the traditional render application.
Two coats of render are typically applied today. Depending on the type of brick or stone it is being put to, each coat’s strength (the proportion of sand to cement powder or lime, if it is used) will vary.
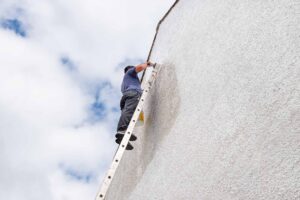
Most of the time, only small-scale repairs to the render will be needed, and the initial task is often to slice off any hollow, loose, or cracked render. As a result, there will be bare spots on the wall that must dry off before a new render is put.
Patching is easier than rendering vast areas, which requires expertise. You might need to budget for complete wall redecoration because “invisible” repairs, even in the hands of skilled craftsmen, are challenging to complete.
In order to avoid traditional lime render failing around the edges of the repair, traditional lime render on historic buildings should never be patched with cement. This prevents moisture in the wall from evaporating, forcing it out to the edges of the new patch. Another option is to clothe the wall with something appropriate, such old-fashioned tiles suspended from battens fastened over the old render.